STEP
1
1.
The first thing you want to do is remove the hood
from the Rzr and place it on a bench or surface
where you will be able to move it around and work
on it. Use masking tape to completely cover the
front of the hood. This will prevent the hood
from getting scratched up and also give you something
to place marks on for centering and marking the
holes to be cut.

|
STEP
2
2.
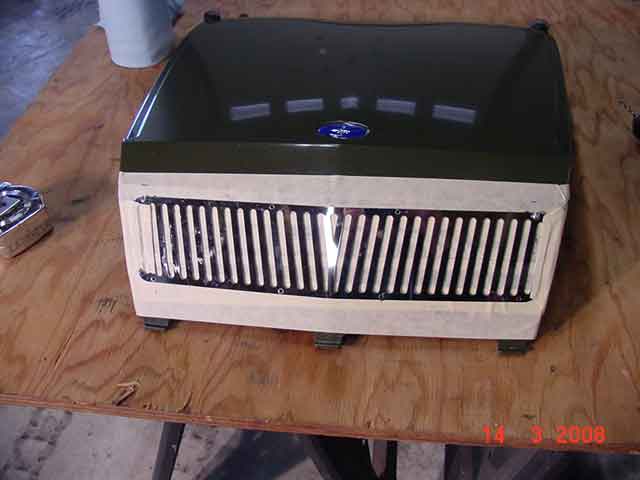
Next, position the grill on the hood. It should
be approximately 5/8” down from where the
hood starts to angle up towards the top and 5/8”
from each side. Place the grill on the hood in
this location and use some masking tape to secure
the grill to the hood so you can look at it and
make sure it is where you want it. When you have
it secure and you are sure everything is centered
and square. Drill 5/32” holes through the
screw holes in the grill. Drill one at a time
and place a screw in the hole before you move
on to the next one to keep it from moving. Drill
the inner holes first and move to the outer holes.
|
STEP
3
3.
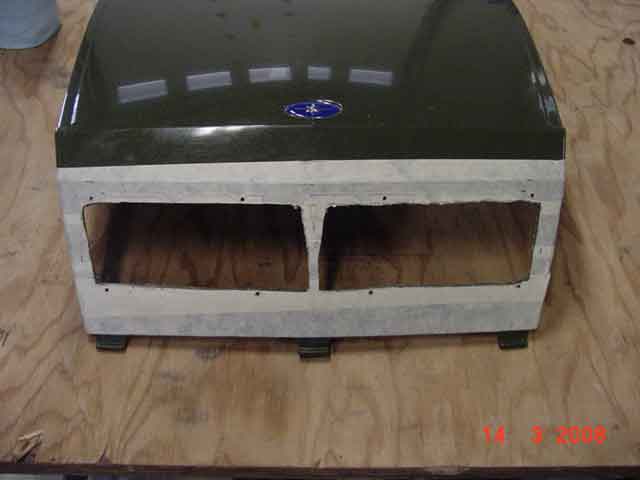
Once you have all the holes drilled, use a sharpie
to place marks on the masking tape through the
grill at the top and bottom of each slot and on
the edges of the outer slots on each side of the
grill. This will give you marks to use as an outline
for the hole you will be cutting out behind the
grill. You can also mark around the center slot
in the grill and leave that section in place when
you are cutting for some additional strength if
you want to. This is what I did in the picture
below. Once you have made your marks, remove the
grill from the hood, use a straight edge to mark
out the hole to be cut using the marks you placed
on the tape through the grill as a guide. Once
you are confident that the pattern is marked correctly,
you can start the process of cutting it out. Start
by drilling a 3/8” hole somewhere in the
cutout section which will be a place for you to
get the jigsaw blade through the plastic. Very
carefully make the cutout using a jigsaw. Take
your time here because you only get one chance
at it.
|
STEP
4
4.
When you have finished the cut, remove all of
the masking tape. This is also a good time to
use a heat gun to remove the Polaris decal from
the front of the hood if it is still there. Use
a file or some sand paper to finish off the inside
of the cutout area.

|
STEP
5
5.
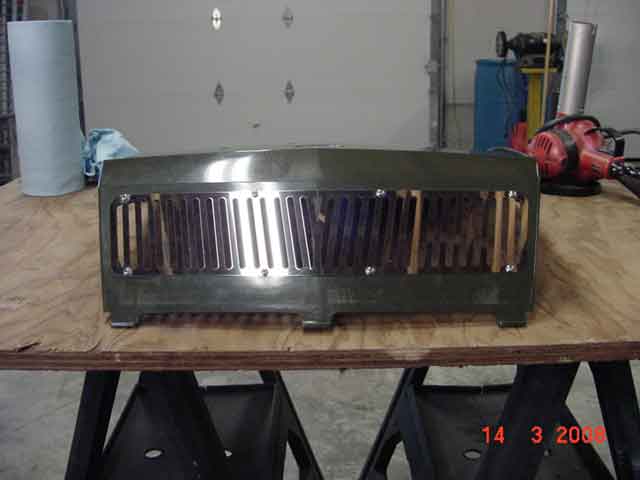
Once you have finished cleaning up the cutout,
place the grill over the area and insert the fasteners
with the flat washer on the back side of the hood
under the lock nut, finger tight. When all of
the fasteners are installed, tighten the inside
screws first, then the outside.
|
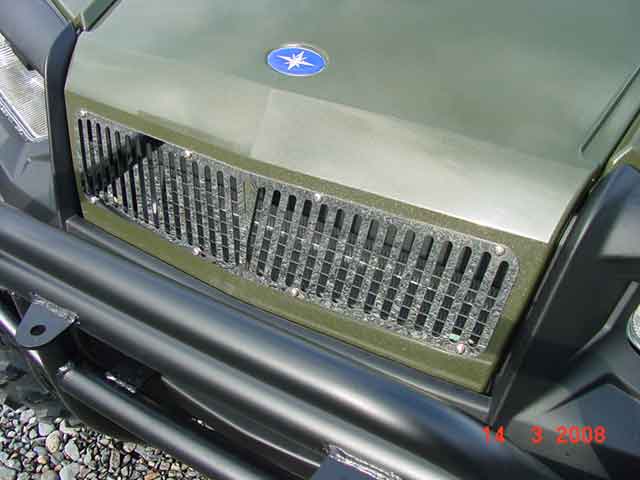
The
finished product installed.

|
